
Guide Contents
Quick Navigation
Microsoft Office Phone Activation Guide
Guide Contents
Quick Navigation
Why Phone Activation?
Microsoft Office can be activated in two ways: Online Activation and Phone Activation.
Online activation is the quickest method, as it connects to Microsoft's servers automatically and completes in seconds, provided your internet connection is stable, and the key is valid for online use.
Phone activation, on the other hand, is used when a product key is specifically designed for it, or when online activation is unavailable. This guide covers phone activation, which is required when online activation is unavailable or when the key type specifically requires it.Follow the steps below to activate your Microsoft Office using the product key provided by IT Guy:
THE 5-STEP PROCESS
Step 1: Open Office
Buy an original MS Office Product Key from the IT Guy at the best price for your peace of mind.
Step 2: Enter the Product Key
Step 3: Choose Phone Activation
482910 - 582011 - 920192 - 102938 - 572910 - 291029 - 482910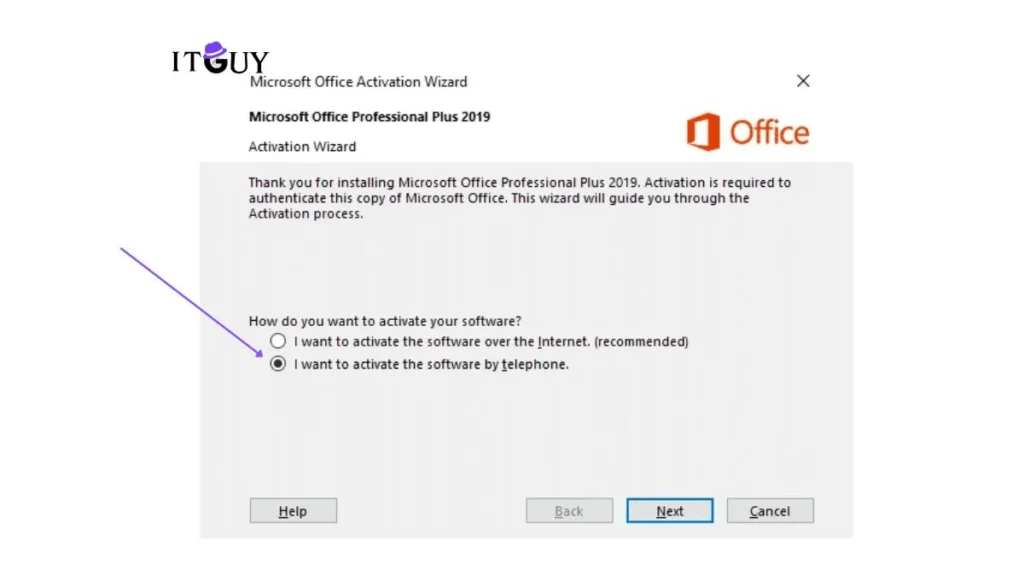
Step 4: Contact IT Guy for Confirmation ID
 Contact Us On WhatsApp
Step 5: Enter the Confirmation ID
[A]______ [B]______ [C]______ [D]______ [E]______Troubleshooting
Get Genuine Office Keys
Skip the headache. Get fully supported Microsoft Account Bind keys that activate effortlessly and last a lifetime.
Activation FAQ
How can I check the edition of Microsoft Windows?
-
Press Windows key + R, type
winver, and press Enter. -
A window will appear showing your Windows edition and version.
-
Alternatively, go to Settings > System > About, then look under Windows specifications.
-
How can I check if my Microsoft Windows is activated?
-
Go to Settings > System > Activation.
-
Look under Activation state:
-
If it shows Active, your Windows is genuine and activated.
-
If it says Not active or shows an error, activation is required.
-
-
How can I activate my Microsoft Windows through a product key?
-
Open Settings > System > Activation.
-
Click Change product key.
-
Enter your 25-character product key.
-
Select Next, then follow the on-screen steps to complete activation.
-
How can I check the type of activation used in Microsoft Windows?
-
Press Windows key + R, type
cmd, and press Enter. -
In the Command Prompt, type:
and press Enter.
-
A window will show if your license is Retail, OEM, or Volume, and whether it’s activated with a digital license or product key.
-
What is the difference between OEM and Retail key?
-
OEM = one PC forever (cheaper, locked to hardware).
-
Retail = flexible (can reinstall or move to another PC, but more expensive).
-
More Curated Guides
Buy the best WordPress plugins for developers from IT Guy: Elementor Pro & Essential Add-Ons | WPRocket | WPForms | Rank Math Pro | and Gravity Forms Elite.
Buy original MS Office 2016 product key. Verify authenticity, activate securely, and receive the Office 2016 license key from the IT Guy.
Learn what a license key is, why you may need to buy Windows for a new PC, what a license for Windows is, and how to activate Windows securely.
Microsoft Office can be activated in two ways: Online Activation and Phone Activation.
Online activation is the quickest method, as it connects to Microsoft’s servers automatically and completes in seconds, provided your internet connection is stable, and the key is valid for online use.
Phone activation, on the other hand, is used when a product key is specifically designed for it, or when online activation is unavailable. This guide covers phone activation, which is required when online activation is unavailable or when the key type specifically requires it.
Follow the steps below to activate your Microsoft Office using the product key provided by IT Guy:
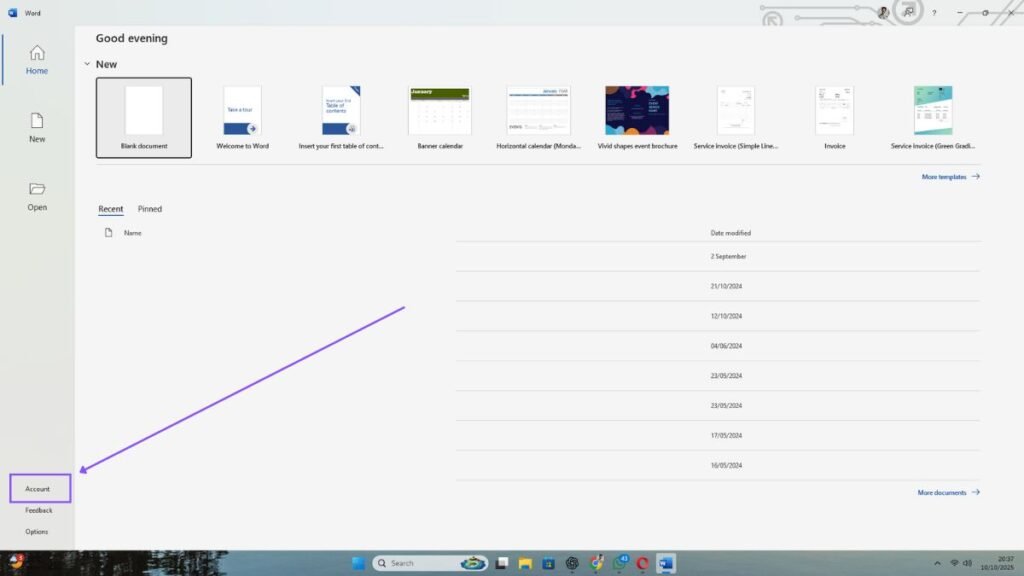
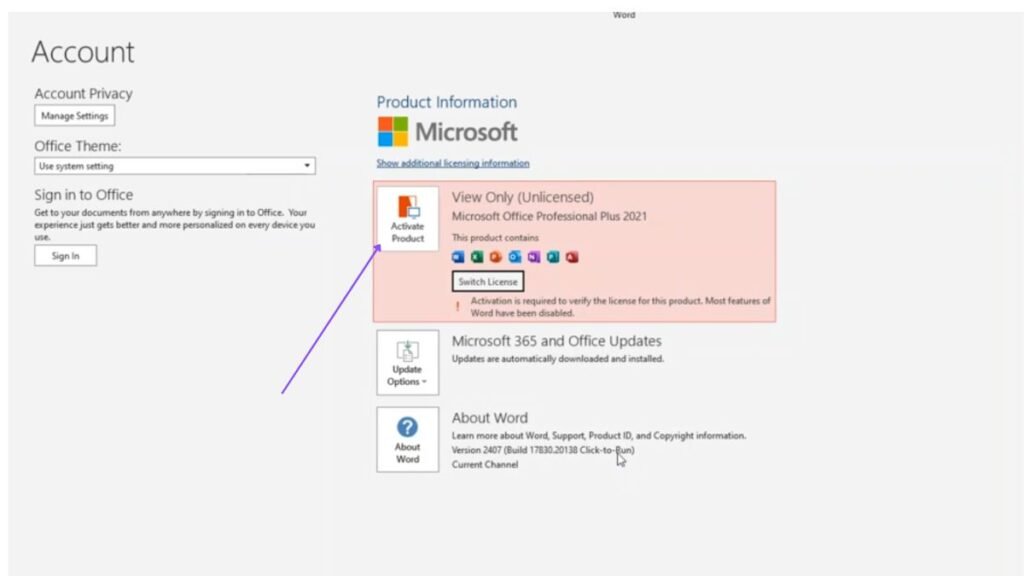
Step 1: Open Office
Buy an original MS Office Product Key from the IT Guy at the best price for your peace of mind.
-
Run any Office application such as Word or Excel.
-
Click on the File menu, then select Account (or Help, depending on your version).
-
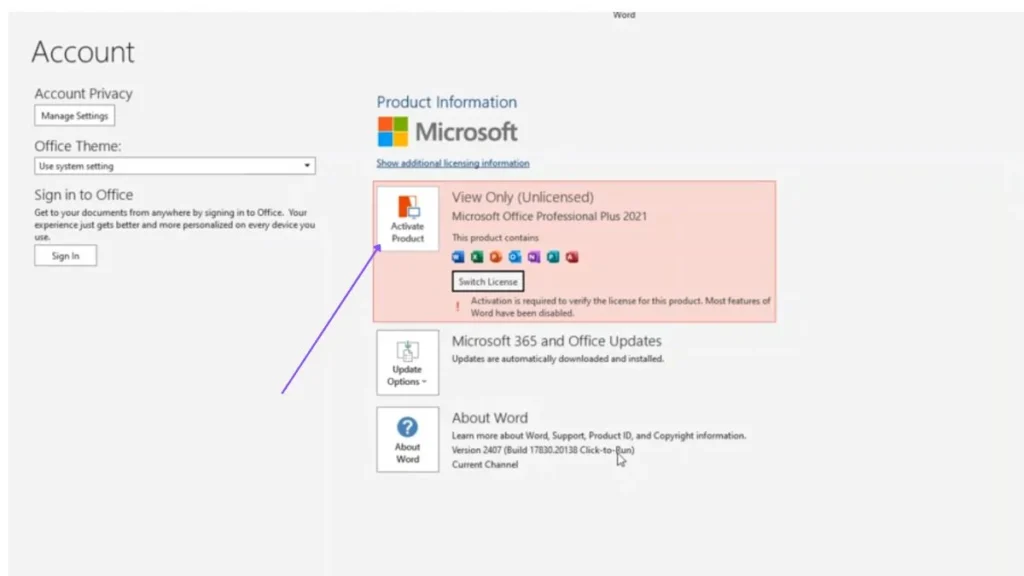
Click on Activate Product or Change Product Key.
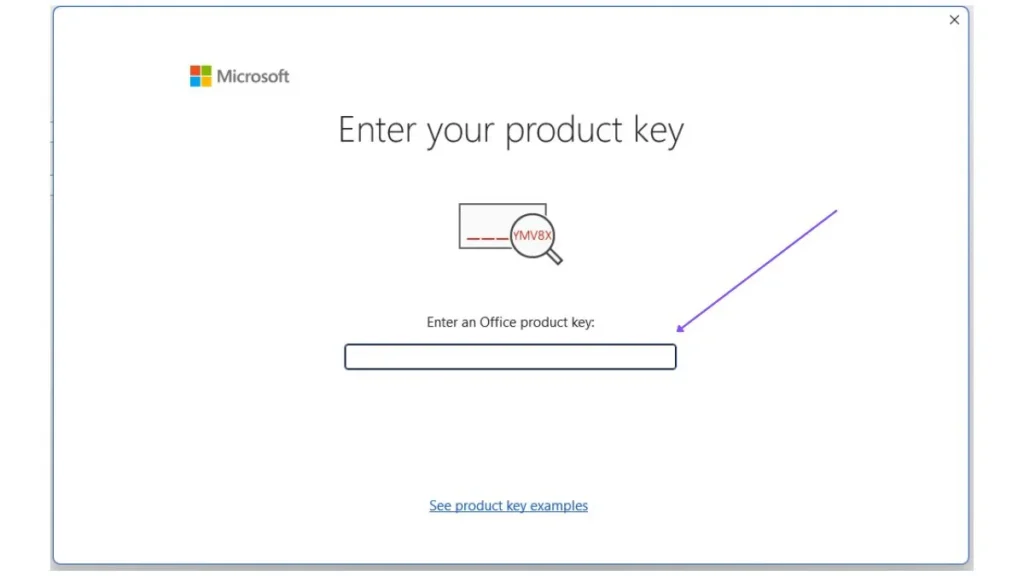
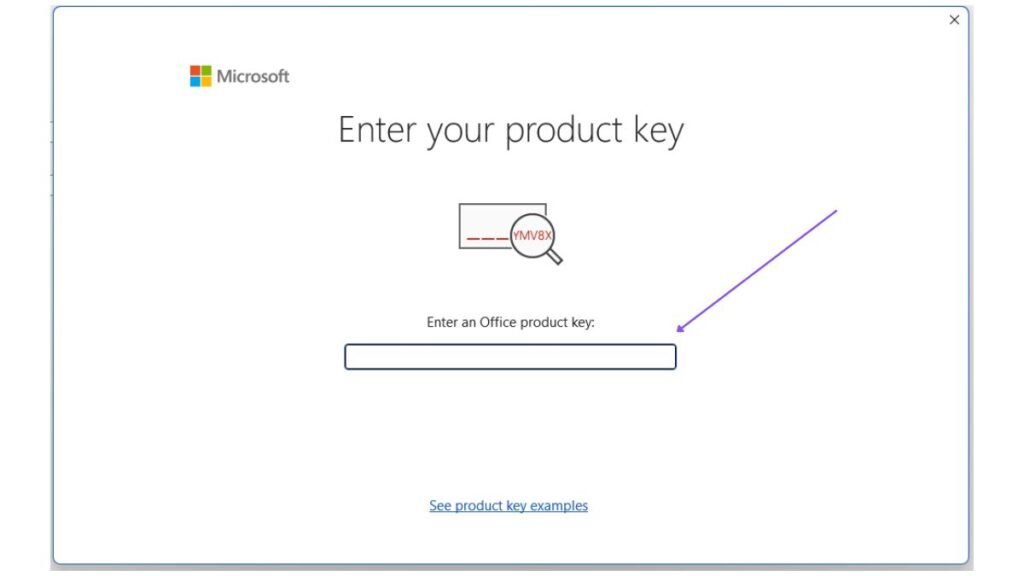
Step 2: Enter the Product Key
-
Enter the product key you received from the IT Guy.
-
Click on Activate.
-
You may now see a message that Office is not activated — this is normal.
Don’t close the window. Simply proceed to the next step to complete activation via phone.
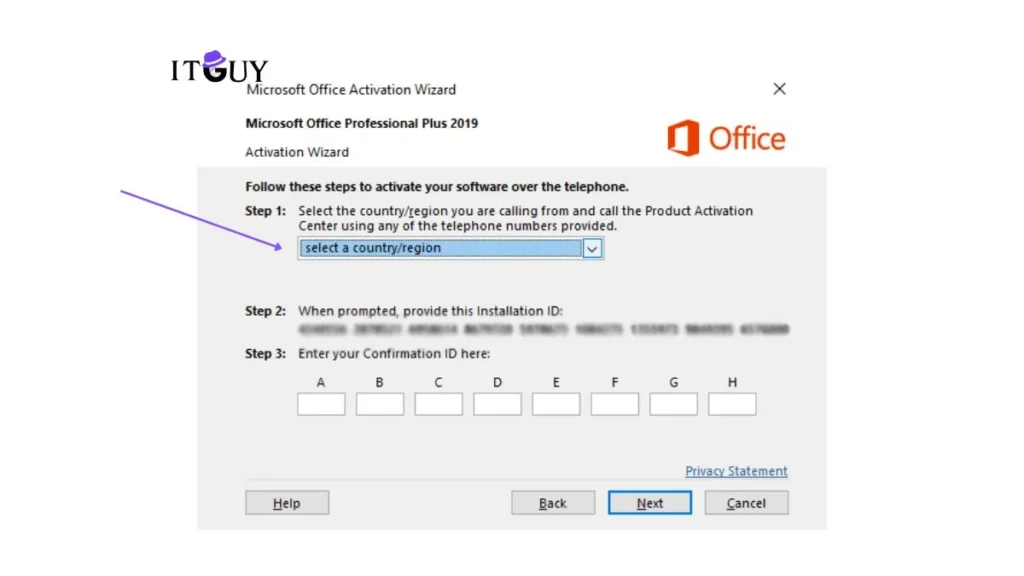
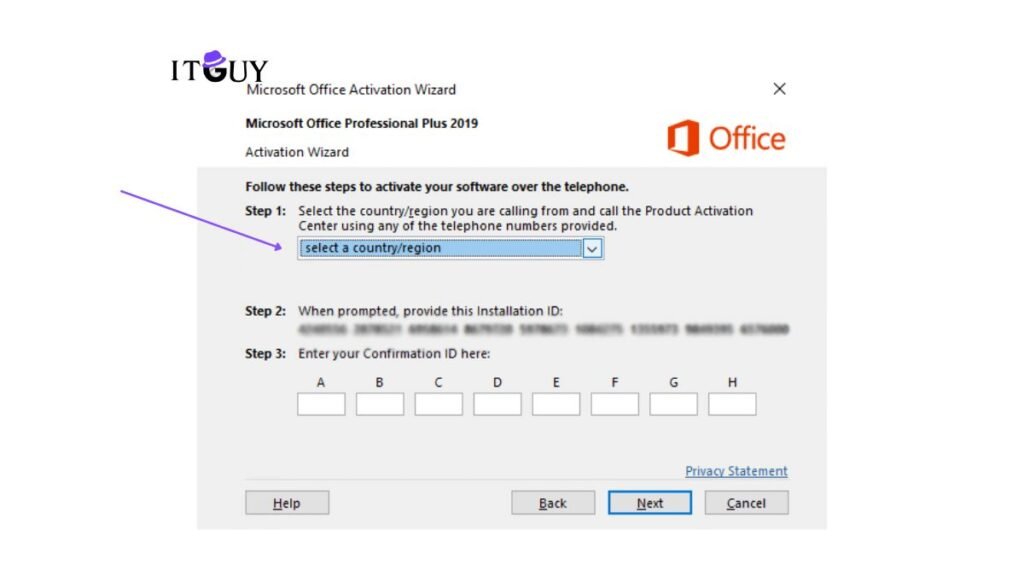
Step 3: Choose Phone Activation
-
Click on Activate Product again.
- Select I want to activate the software by telephone.

-
Choose your country or region (e.g., Pakistan).
-
You will now see an Installation ID (a series of numbers on your screen).
Step 4: Contact IT Guy for Confirmation ID
-
Copy or take a clear screenshot of your Installation ID.
-
Send it to our support team on WhatsApp for verification and activation assistance. Our team is available during business hours and typically responds within minutes on working days.
Step 5: Enter the Confirmation ID
-
Once you receive the Confirmation ID from our support team, enter it in the required boxes.
-
Click Next to complete the activation.
Your Microsoft Office is now successfully activated and ready to use. If activation fails, double-check the Confirmation ID entry and ensure all boxes are filled correctly before clicking Next.